这个事儿很复杂啊,尤其是对于我这种很不会和“环境”打交道的人来说,今天捣鼓了半天终于捣鼓明白了,所以写个文章记录一下。
所用到的软件有Matlab 2019A和Visual Studio 2022.
编写C语言代码,编译为.dll库
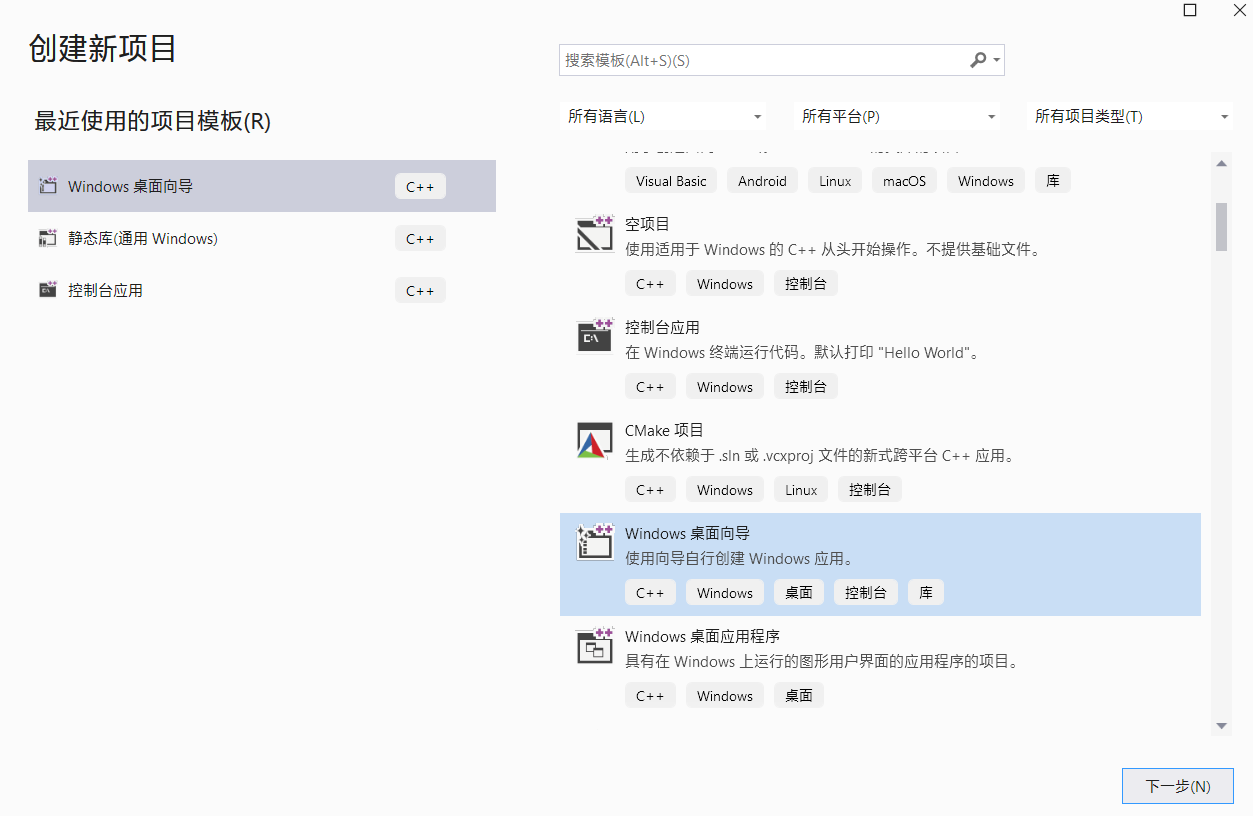
在VS2022中新建项目,选择“Windows桌面向导”
image-20240415171656059
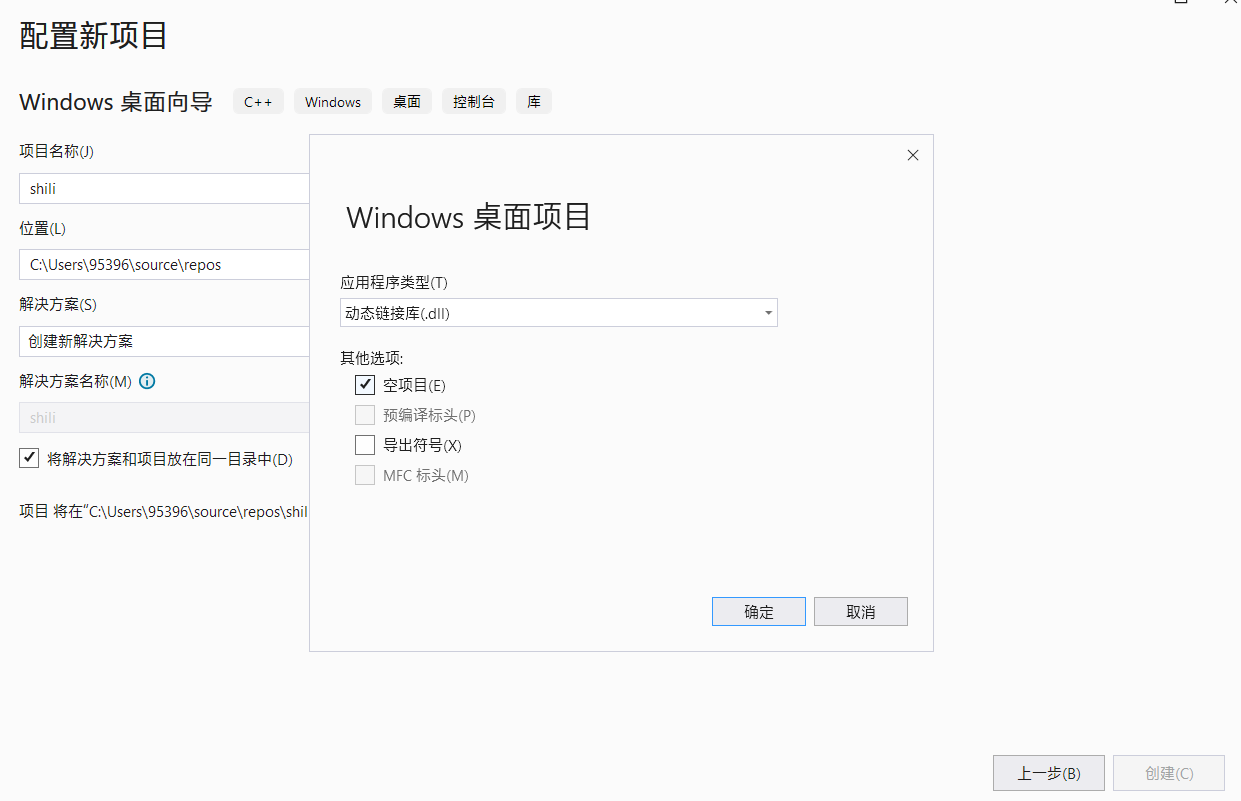
给项目起个名字,选择“动态链接库”,并选择“空项目”
image-20240415171819074
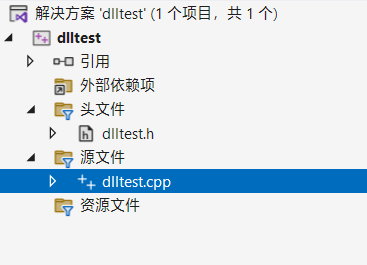
在“源文件”和“头文件”中创建文件
image-20240415171928365
两个文件的内容如下:
1 2 3 4 5 6 7 8 9 10 11 12 #include "dlltest.h" int add_dll (int a, int b) return a + b;int sub_dll (int a, int b) return a - b;
1 2 3 4 5 6 7 8 9 10 11 12 13 14 15 16 17 18 19 #ifdef __cplusplus extern "C" #endif int __declspec(dllexport) add_dll (int a, int b);#ifdef __cplusplus #endif #ifdef __cplusplus extern "C" #endif int __declspec(dllexport) sub_dll (int a, int b);#ifdef __cplusplus #endif
注意:.h文件必须严格按照上面的格式书写,否则编译完成以后,在
Matlab 中调用时会出现“calllib 找不到方法”的错误。
这个extern "C"的意思,就是里面包括的代码只能用C语言的语法 ,例如string要用char*,vector要用数组,STL的所有容器都不能直接用,各种对象要用void *来传递,所以本质上还是C语言的动态库。如果一定要用C++,那么得用mex。
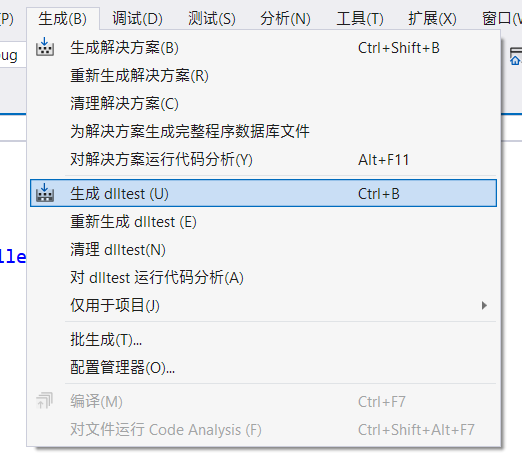
写完代码以后,点击“生成/生成dlltest”
image-20240415172115882
在对应路径找到 dlltest.dll 文件
image-20240415172158982
然后保存dlltest.dll文件和dlltest.h文件,这是我们未来要使用到的文件。
编写Matlab测试代码,调用
.dll 库
在写Matlab代码之前,先需要完成一些基本的配置,也就是安装mex。
首先,下载这两个文件:
msvcpp2022.xml
msvc2022.xml
然后把它放到Matlab的安装目录…\Matlab\R2019a\bin\win64\mexopts里面。
在Matlab中运行代码 mex -setup -v,最终看到
1
2
3
4
5
6
7
8
9
10
MEX 配置为使用 ' Microsoft Visual C ++ 2022 ( C ) ' 以进行 C 语言编译。: Matlab C 和 Fortran API 已更改,现可支持2 ^ 32 - 1 个以上元素的 Matlab 变量。您需要API 。: https :// www . mathworks . com / help / Matlab / Matlab_external / upgrading - mex - files - to - use - 64 - bit - api . html 。: mex - setup C ++ mex - setup FORTRAN
就算成功,然后点击 mex -setup C++,就行了。
新建文件夹,把之前得到的dlltest.dll文件和dlltest.h文件复制进去,然后新建
Matlab 脚本,内容如下:
1
2
3
4
5
6
7
8
9
10
11
12
slib_name = 'dlltest' ; 'dlltest.h' ; 'add_dll' ; if not(libisloaded(slib_name)) '-full' ); end 1 ;2 ;
运行脚本,输出
1
2
3
4
5
6
7
8
9
10
类 lib.dlltest 的方法:int32 add_dll(int32 , int32 )int32 sub_dll(int32 , int32 )3
说明你已经成功实现在 Matlab 中调用 .dll 库。
使用App designer创建软件
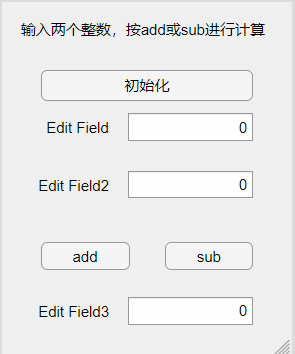
首先简单画个UI界面,大概就这样:
image-20240415173905647
其中有三个回调函数、一个全局属性需要写,代码如下:
1 2 3 4 5 6 7 properties (Access = private)'dlltest' ;'dlltest.h' ;'add_dll' ;'sub_dll' ;end
1 2 3 4 5 6 7 function addButtonPushed (app, event) end
1 2 3 4 5 6 7 function subButtonPushed (app, event) end
1 2 3 4 5 6 7 function ButtonPushed (app, event) if not(libisloaded(app.slib_name))'-full' );end end
然后点运行,应该就可以出现想要的效果了。但是这时候我们打包APP时,发现即使把dlltest.dll文件和dlltest.h文件打包进去了,出来的.exe文件还是没有办法运行。这是因为我们需要修改一下loadlibrary函数的写法。
退出并重新打开 Matlab
,然后不要进行任何操作,在你的工作文件夹中运行
1 loadlibrary('dlltest' , 'dlltest.h' , 'mfilename' , 'mylibrarymfile' )
这里面的mfilename是不能调整的,mylibrarymfile是可以自定义的。
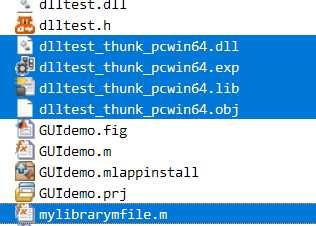
然后你的文件夹中会多出一些文件:
image-20240415174850140
然后,把你的loadlibrary函数的写法都修改成:
1 loadlibrary(app.slib_name, @mylibrarymfile);
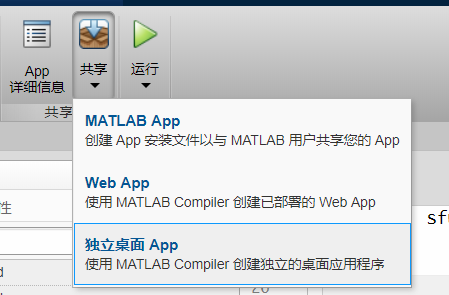
然后,点击共享/独立桌面APP
image-20240415175120148
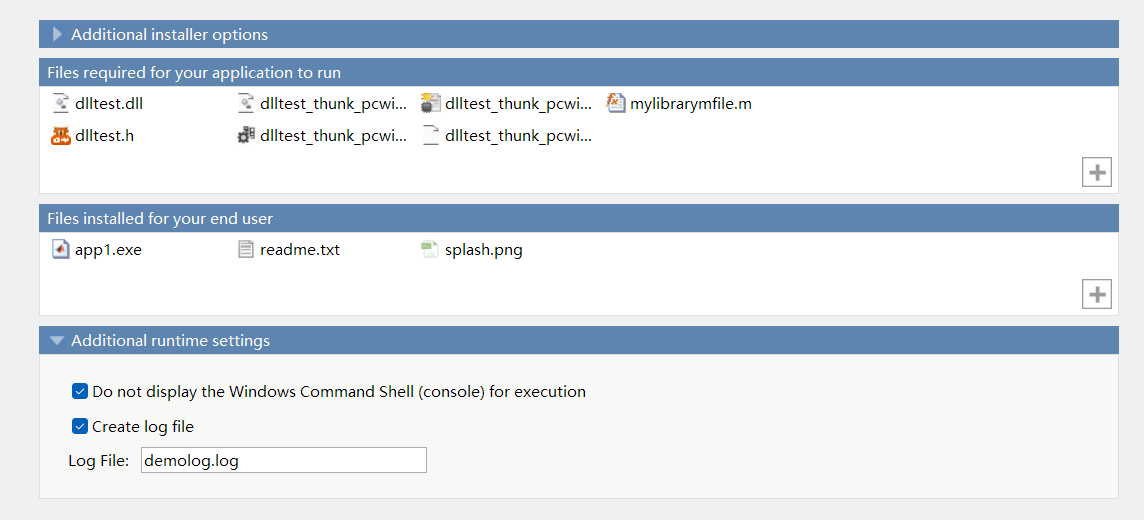
名字什么的自己填,关键是这里:
image-20240415175205628
在 Files required for your application to run
中,把所有和dlltest有关的文件,以及最后生成的mylibrartmfil.m全部丢进去,然后选择
Create log file 创建日志(日志非必须,只是方便你查错而已)。
然后选择”Runtime included in package“,检查后点击”Package“。
image-20240415175326391
它会生成一段时间,你可以休息一下。生成完毕后,在\工作文件夹\app1\for_redistribution中找到用于共享的安装包。顺便一提,你可以在
\工作文件夹\app1\for_redistribution_files_only
里面预览安装后的效果。
附录
APP Designer的完整代码:
1
2
3
4
5
6
7
8
9
10
11
12
13
14
15
16
17
18
19
20
21
22
23
24
25
26
27
28
29
30
31
32
33
34
35
36
37
38
39
40
41
42
43
44
45
46
47
48
49
50
51
52
53
54
55
56
57
58
59
60
61
62
63
64
65
66
67
68
69
70
71
72
73
74
75
76
77
78
79
80
81
82
83
84
85
86
87
88
89
90
91
92
93
94
95
96
97
98
99
100
101
102
103
104
105
106
107
108
109
110
111
112
113
114
115
116
117
118
119
120
121
122
123
124
125
126
127
128
129
130
131
132
133
134
135
136
137
138
139
140
141
142
143
144
145
146
classdef app1 < Matlab.apps.AppBaseproperties (Access = public)end properties (Access = private)'dlltest' ;'dlltest.h' ;'add_dll' ;'sub_dll' ;end methods (Access = private)function addButtonPushed (app, event) end function subButtonPushed (app, event) end function ButtonPushed (app, event) if not(libisloaded(app.slib_name))'-full' );end end end methods (Access = private)function createComponents (app) 'Visible' , 'off' );100 100 232 285 ];'UI Figure' ;'right' ;32 175 55 22 ];'Edit Field' ;'numeric' );102 175 100 22 ];'right' ;25 129 62 22 ];'Edit Field2' ;'numeric' );102 129 100 22 ];'push' );true );32 72 71 22 ];'add' ;'push' );true );131 72 71 22 ];'sub' ;'right' ;25 28 62 22 ];'Edit Field3' ;'numeric' );102 28 100 22 ];'push' );true );32 207 170 25 ];'初始化' ;16 253 202 22 ];'输入两个整数,按add或sub进行计算' ; '' };'on' ;end end methods (Access = public)function app = app1 if nargout == 0 end end function delete (app) end end end
本站的运行成本约为每个月5元人民币,如果您觉得本站有用,欢迎打赏:
